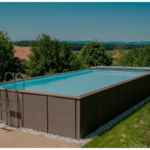
The installation process of a fiberglass pool can be a fun and exciting event if you’re prepared for what’s to come. There are many necessary steps to building a beautiful pool installed by a professional. Here, we’ll give you an idea of how long each step takes, so you have a better sense of when your pool will be complete. Keep in mind that backyard conditions, weather, or the number of workers can impact the timeline for different stages of a pool project.
Fiberglass pools will have a positive impact on your life and that of your family. From parties to leisurely swims, outdoor meals, and relaxing evenings, your pool will provide a variety of benefits. Unfortunately, there will be time, effort, and expenses involved in completing the project, but the reward will be worth it!
Construction Options (link)
Table of Contents
What to Expect When Installing a Fiberglass Pool
Excitement is building! You’ve just signed on the dotted line and are ready to start the installation process of your new fiberglass pool. While you can anticipate many years of splashing and fun in your own backyard oasis in the very near future, there will be a period of “growing pains” to properly install your new pool.
Let’s not sugarcoat it: the fiberglass pool construction process will require heavy equipment, and your backyard will look like a construction site for a few weeks. But take deep breaths—this is only temporary! To prepare you for the road ahead, we’ll guide you through the necessary steps to provide a more accurate picture of what to expect in terms of installation time.
Step 1: Backyard Preparation and Excavation
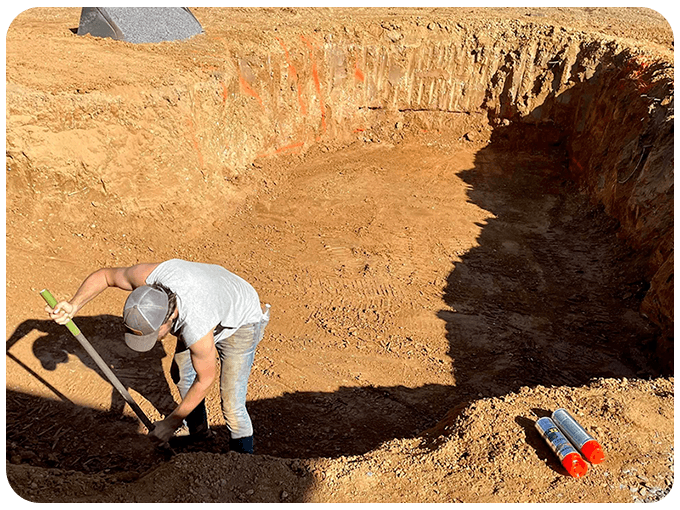
Site preparation begins with obtaining the proper permits and identifying where utilities are located within the project area. Utilities can be buried or overhead and may interfere with the project, needing to be marked for relocation before any work begins. Once you have the permits and utilities sorted, the site is prepared by first establishing the final grade of the pool wall. Long before applying for a building permit, the excavation area is prepared by outlining the pool dimensions with spray paint or using a prefabricated template that matches the pool design. This shouldn’t take more than a couple of hours at most, depending on equipment. Once the elevation is set and the design is marked, excavation can begin.
Step 2: Excavation and Placement
Before fiberglass pool construction begins, the first step is clearing a space in your backyard or side yard where the pool will be located. The amount of space needed for your pool excavation will depend on the design template, size, and shape of the fiberglass shell you choose.
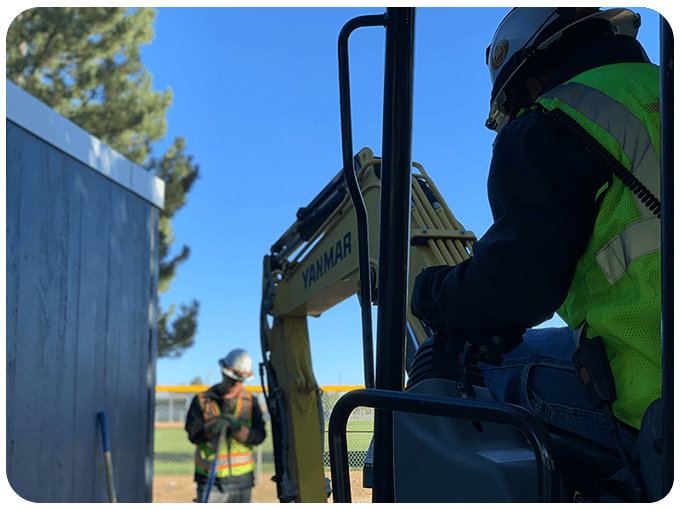
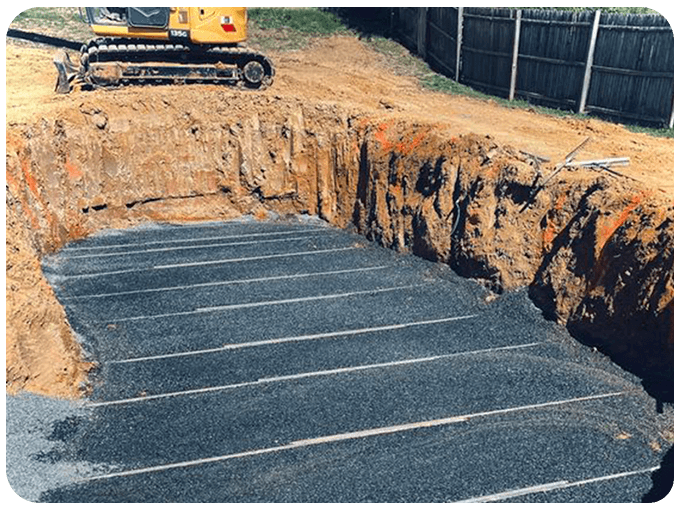
Most of the excavation will be done by an excavator, which will remove the vast majority of the earth. Care is taken to follow the pool contour by excavating just beyond the pool dimensions by 8 to 12 inches for a “tight” fit. Once excavation is complete, it’s time to place the base material for the pool’s foundation in the hole that has been dug.
What Goes Under a Fiberglass Pool?
The base for an in-ground fiberglass pool typically consists of a two-inch gravel base. The purpose of the foundation is to give your pool a firm, even, and stable surface to rest on, minimizing the risk of settling, bulging, or leaks that could damage the pool and surrounding soil. In order to add sand or ½” gravel fill material and prepare a smooth area for the bottom of the pool to rest on, the pool must be excavated 4” deeper than necessary.
Next, the pool is installed using a crane or other equipment using lifting straps to meet APSP/ANSI codes for level application. This may take the builder several attempts to prepare the hole bottom and lift and level the pool. This is a standard procedure. Additionally, a main drain line or daylight drain is installed at the deep end of the pool to help balance hydrostatic pressure, which is the pressure that pool water exerts on the pool walls and floor from the inside. From the start of excavation, you can expect up to 3 days until your fiberglass pool is located in the excavation site. Some builders can complete this process in 1 day, while others, with different equipment, may take longer.
Step 3: Adding Water and Backfill
Once the pool is leveled, the process of adding water and backfilling begins. Backfilling is the process of filling the space between the fiberglass pool shell and the excavated hole (also known as “blocking” the pool). This is also the stage where water is added to the pool along with a drainage pipe to assist proper water circulation.
First, 6” of sand or 6” of ½” gravel is placed around the pool’s lower radius. Then the pool is filled with 6” of water. To ensure equal pressure on the pool’s exterior and interior walls during backfilling, your builder will alternate between blocking the pool with six inches of gravel and then filling it with six inches of water. Working carefully and precisely, your builder will continue alternating between these procedures until backfilling and pool filling are complete.
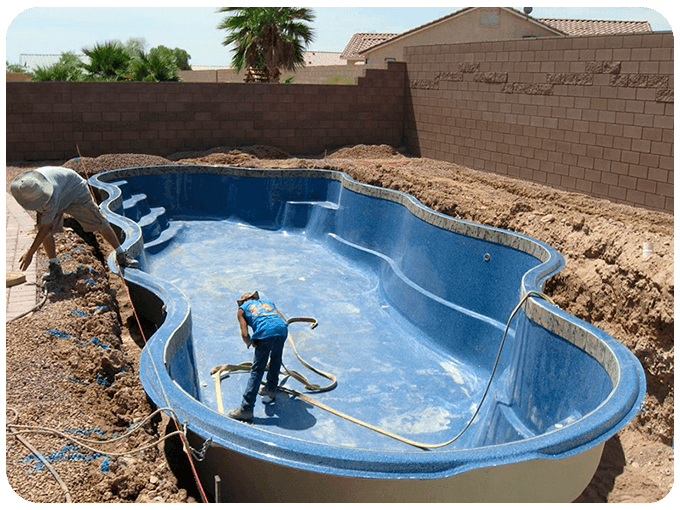
When backfilling and water reach areas for plumbing fixtures, the builder will connect PVC piping to the fixtures and test line pressure for leaks. This is also when lights and other potential water features will be installed. If everything is functioning, then the process of adding water and backfill continues until they are ground level for deck placement. This entire process can take anywhere from 1 to 4 days, depending on the builder.
Step 4: Electrical and Plumbing Installation
To keep your fiberglass pool cool and clean, it needs a plumbing system. This system consists of two main parts: a pool filter that removes small debris and a pool pump that circulates water through the filtration system. Keep in mind that, even with filters, you’ll need to skim your pool periodically with a net to remove larger debris.
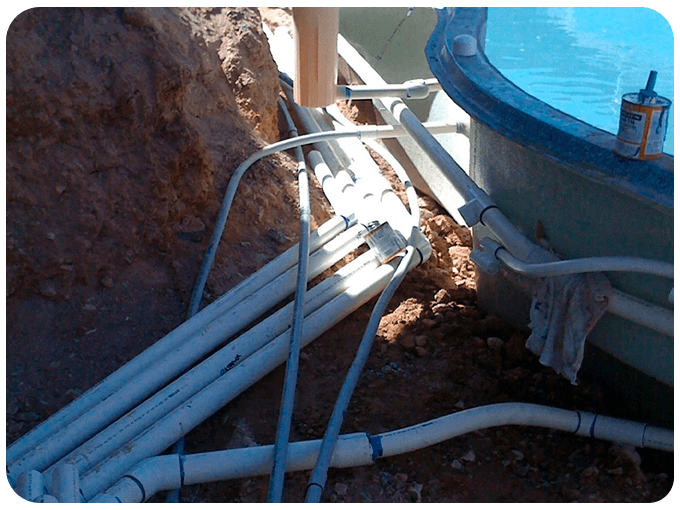
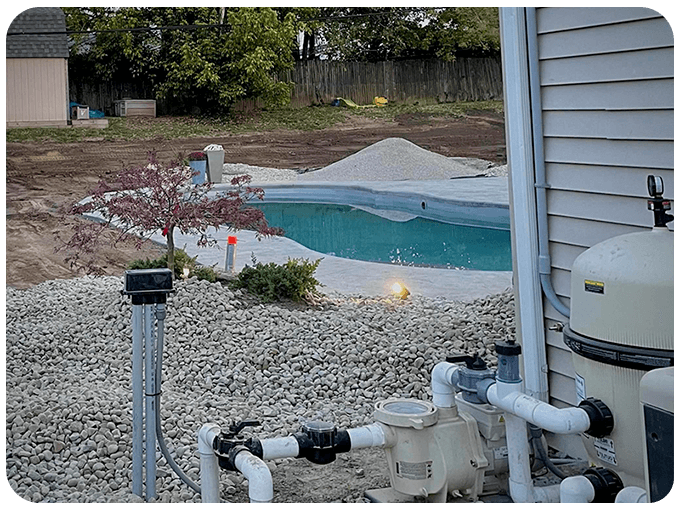
A equipment pad will be strategically located on the project site to hold the pump, filter, heater, electrical connections, and other options that may be part of the installation. As plumbing and electrical lines were already run in previous steps, connecting the pump, filter, heater, water features, and electrical lighting is a straightforward process. Depending on local staff and inspection requirements, this part of the process typically takes an average of 1 to 3 days.
Step 5: Pouring Concrete and Finishing the Pool
Once conditions are right to begin pouring concrete, the pool area deck will begin to take shape. Preparing the forms, pouring the concrete, and allowing it to set can take 2 to 3 days, depending on the weather. While the concrete cures, the construction team will clean up the site and ensure that your in-ground fiberglass pool and all equipment are functioning properly.
Fiberglass Pool Installation Guide
You might be wondering now, “How will they get my fiberglass pool into my backyard?” An in-ground pool installation is considered “major construction.” Therefore, if you leave a conversation with an installer believing that “you’ll barely know it’s there,” you probably haven’t set your expectations correctly.
The truth is that large machinery is required to excavate your new pool’s location, place it in position, and backfill around it. Therefore, there will be noise, disruption of your landscaping, etc. In the spirit of full transparency, here are some aspects of in-ground fiberglass pool installation on the ground that you should be aware of:
Access to Heavy Equipment
Excavators, dump trucks, cement mixers, cranes, and other machinery will need access to your yard. This may require the temporary removal of fences, trees, small shrubs, etc. And this equipment is heavy, so it will create ruts in your lawn. If access is inhibited, additional costs may apply.
Driveway/Sidewalk Damage
While your installation crew will be very careful entering and exiting your yard, if they have to bring machinery through a driveway or sidewalk, there’s a possibility of damage.
Unforeseen Bad Weather or Soil Conditions
Poor weather conditions and unforeseen soil conditions, like hitting rocks or water issues, can occur at any time during the construction process, causing setbacks. No one can predict the weather accurately or see underground obstacles, so be prepared for the possibility of setbacks beyond your or the builder’s control.
Unstable Soils Requiring Underpinning
If the soil in the area where your pool will be installed is deemed unstable, you may need to underpin it to create the necessary “lift” to support your pool. This is done by adding layers of compacted stone. While highly effective, this process also takes considerable time.
Rocky or Shale Bed that Needs to Be Removed
Excavating the soil to place a pool is fairly quick. However, if a rocky or shale bed is encountered, a hydraulic hammer must be brought in to break through the layer and be removed.
How Long Does It Take to Install a Fiberglass Pool?
The timeline to build a fiberglass pool could be as little as three days after delivery, however, timing can fluctuate based on factors like weather, your pool’s size, and the types of equipment needed to complete the project. Additionally, your timeline may experience a setback if there are unforeseen complications, like utility lines running under your property or unstable soil. Your builder will be able to help reinforce expectations about timing after assessing your backyard and providing a more precise timeline. In comparison, a gunite in-ground pool typically requires around six to eight weeks for construction, while a vinyl liner pool installation time is usually two to four weeks.
Every installation is different, but the above considerations are the most common.
Tips for Installing a Fiberglass Pool Your Builder Will Know
Here are some expert guidelines your local builder will consider to ensure a quick and efficient installation:
An in-ground pool is not only a source of great pleasure but also adds value to the house where it’s installed. You’ll first need to decide on your specifications. Make sure it fits your exact needs and available space. The next step is deciding where to place the pool. It’s recommended to install it in a spot that receives adequate sunlight exposure.
Once you’ve decided on the location, your builder will outline the preferred area according to the pool’s size. As soon as this is done, builders will excavate the required hole for the pool. Usually, these pools are one level, but if its depth is deeper on a particular end, they’ll need to excavate accordingly. When choosing a design, keep in mind that it complements the surroundings and adds aesthetic value to your home.
If you’re thinking about a tanning ledge, consider how and when you’ll use it most frequently. Most people prefer to be poolside on a tanning ledge. Ensure the side you choose takes advantage of peak sun hours.
FAQs About Fiberglass Pool Installation
Adding a new fiberglass pool to your backyard can be an exciting event. However, you likely have some questions about the process. Not to worry! Here are answers to some of the most common questions we hear about fiberglass pool installations.
How Long Do In-Ground Fiberglass Pools Last?
Fiberglass pools can last a lifetime if properly maintained. Some fiberglass pools installed nearly 50 or 60 years ago are still enjoyed well into the 21st century! However, it’s important to note that while these durable in-ground pools can last for decades, their longevity depends on a variety of factors, including regular maintenance, weather, and proper installation.
Can I Install a Fiberglass Pool Myself?
The longevity of your fiberglass pool begins with ensuring it’s correctly installed in the first place. DIY installation of an in-ground fiberglass pool is not recommended. Because it’s such a complicated and nuanced process involving a variety of logistics and the need for skilled labor, from construction to plumbing and electrical wiring, attempting to install a fiberglass pool on your own can be far more costly than relying on professionals.
To start with, obtaining all the proper permits before construction begins can be challenging, not to mention the need for heavy equipment to dig a hole for your pool and pour concrete. Experienced professionals will be able to confirm if there are public utilities (like electrical wires or water and sewer lines) that may be directly above your pool or buried beneath the ground where you plan to install your pool.
Likewise, if your backyard isn’t level or there are rocks, pipes, or other unforeseen obstacles, attempting a DIY installation can be risky. A trained fiberglass pool professional will be able to assess the situation and offer solutions. Improper ground leveling before installation can affect your pool over time, causing issues that will affect your pool’s overall health. Working with a professional to install your new fiberglass pool is crucial to being able to enjoy it in the decades to come.

